Logging to PC
Log4 measurements can be viewed through the Log4.Desktop application.
Connecting Log4.USB with Log4.Desktop
Connect the Log4 device to PC, then open the Log4.Desktop (Fig. 44).
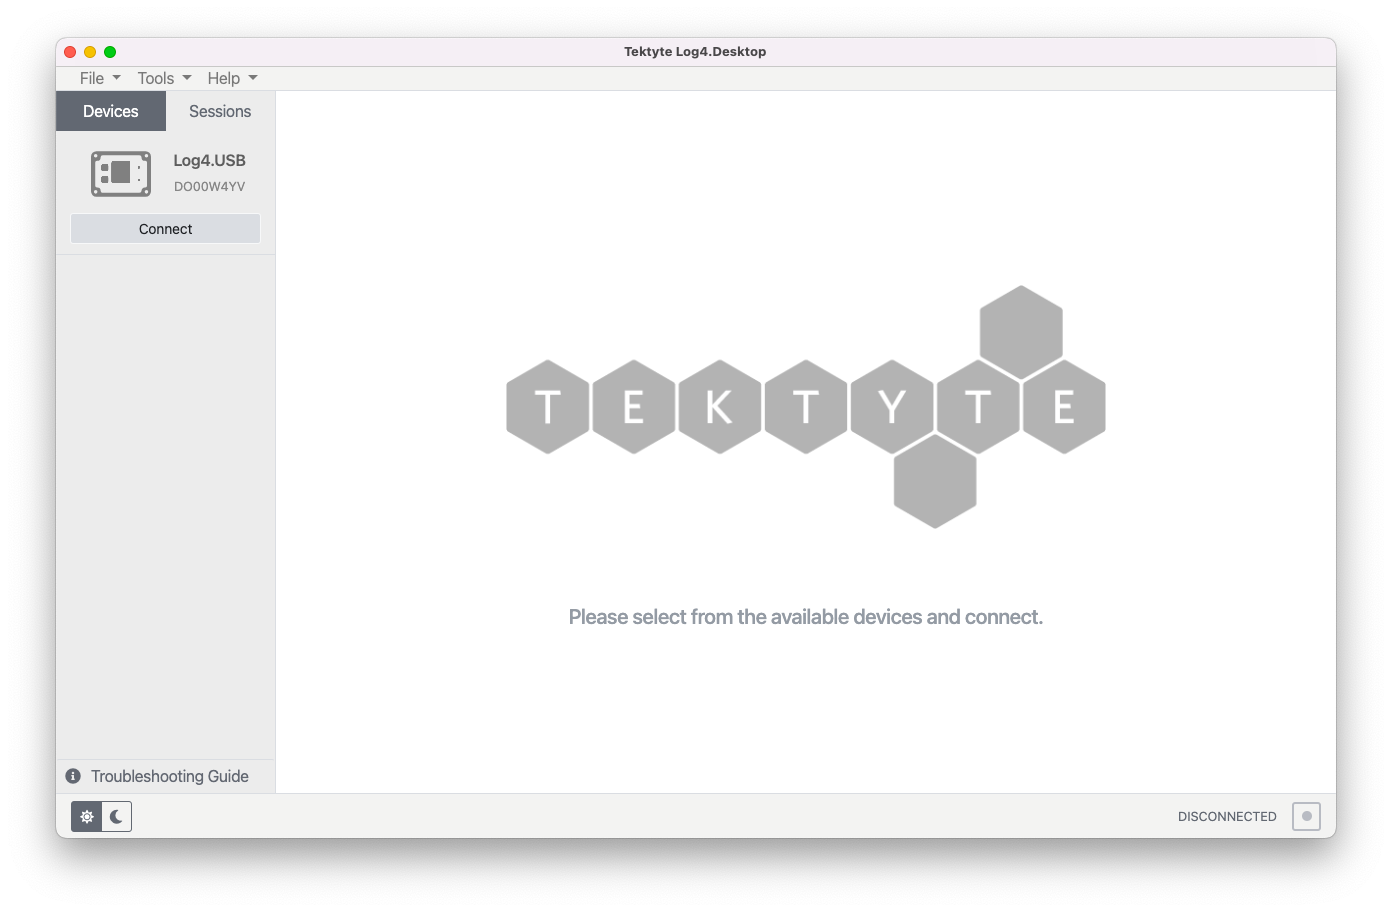
Fig. 44 Log4.Desktop Main Window
Click on a device in the devices pane, and then select Connect. The device will begin streaming measurement data through to the Log.Desktop app (Fig. 45).
Log4.Desktop functionalities
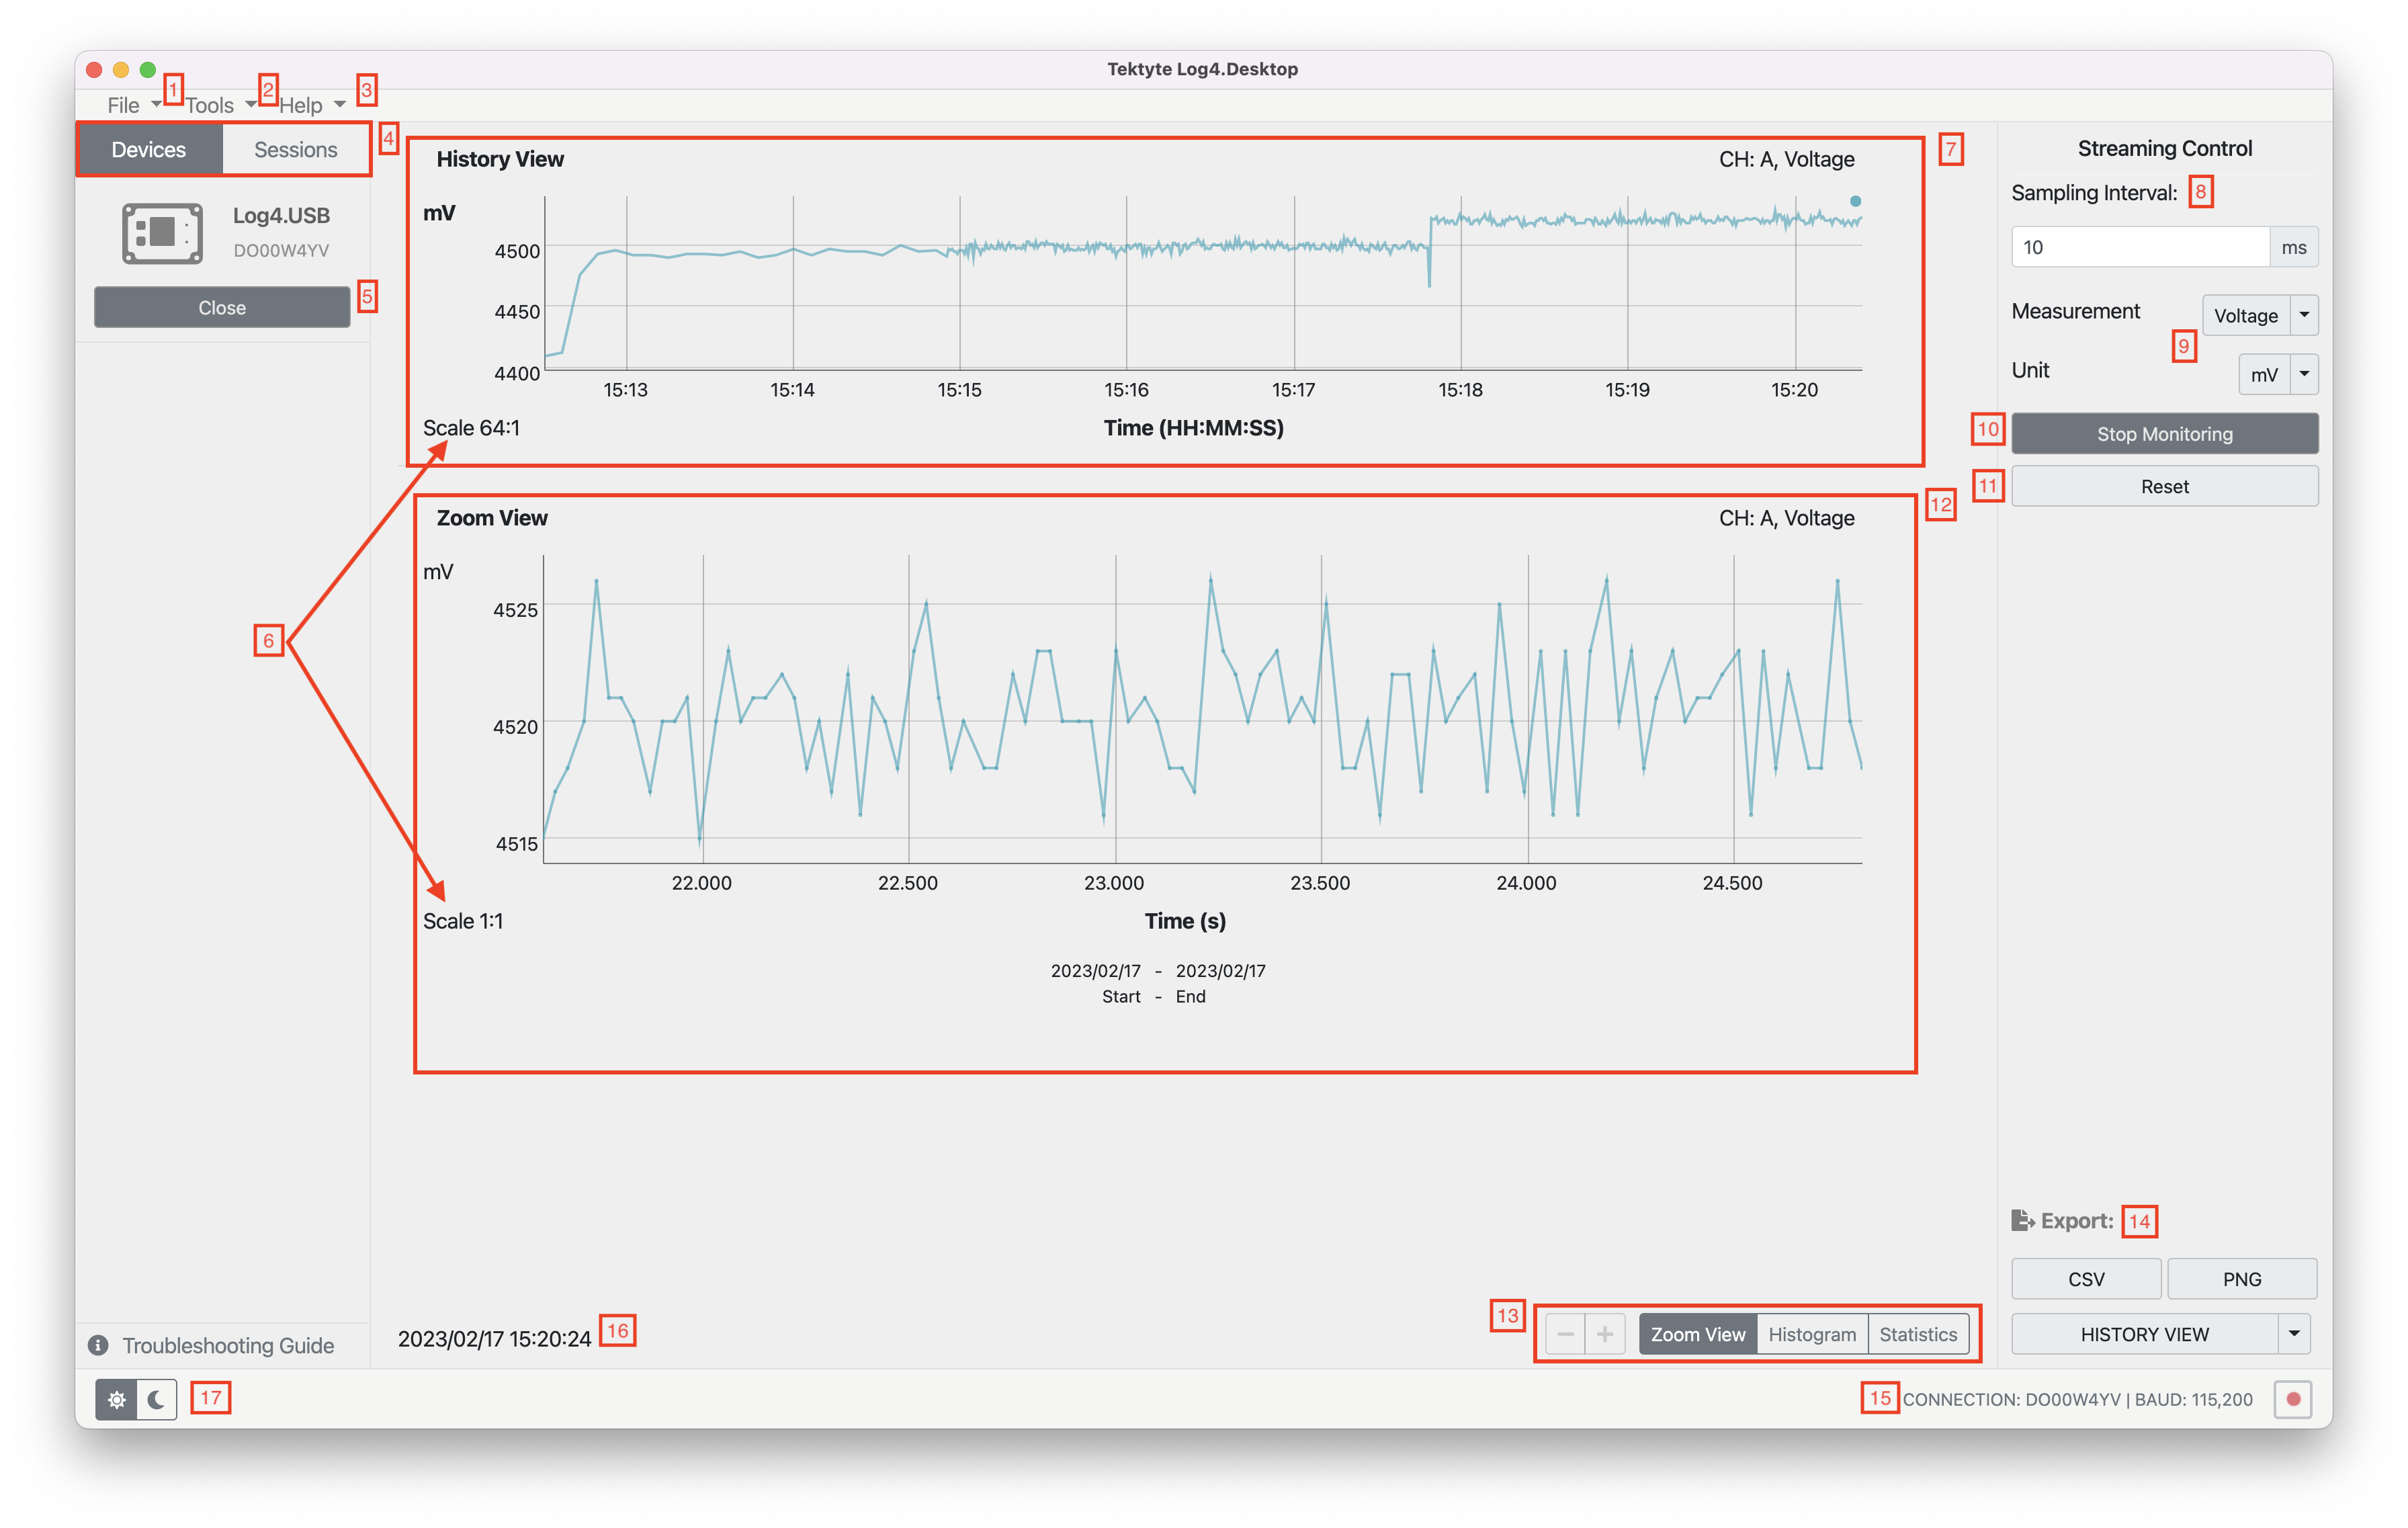
Fig. 45 Log4.Desktop on establishing connection with device
Table below gives the breakdown summary of the Log4.Desktop functionalities as seen in (Fig. 45).
1 |
File Tab |
|
2 |
Tools Tab |
|
3 |
Help Tab |
Link to Tektyte online documentation website, as well as acknowledgements, app info, and checking for app updates. |
4 |
Source Options |
Allows the choice between streaming data from a currently connected device, or viewing data collected in previous sessions. |
5 |
Close Button |
Close the current connection. Clicking this will save the current history to the app and it will be able to be viewed later. |
6 |
Display Scale |
Displays the scale factor for the measurement display. |
7 |
History View |
Displays session data for the selected measurement. |
8 |
Sampling Interval Control |
Control to change the sampling rate of the connected device. |
9 |
Measurement Selection |
Select the measurement to display (from Current, Voltage, and Power). Also enables selection of the display unit. |
10 |
Stop monitoring Button |
Toggles the live updating of new measurements to the screen. |
11 |
Reset Button |
Resets the History View display. |
12 |
Detailed Information View |
Display area for the detailed information, being Zoom, Histogram, or Statistics View. |
13 |
Detailed View Options |
Controls to display the selected detailed views. These are:
Measurement selection is made by clicking and dragging an area on the history view. If an area is selected, the detailed view will display details over that period. To de-select an area, double click on the history view. With no selection made, the measurement selection will use the last 100 data points. Dragging the zoom view if a measurement selection has been made will move forwards and backwards in time. |
14 |
Export menu |
Allows exporting the current session as a CSV or PNG file. |
15 |
Connection display |
Displays the serial port and baud rate of the device connection. |
16 |
Current Date and Time |
Displays the current date and time. |
17 |
Light/Dark mode toggle |
Toggles the application between light and dark mode display. |
Past Session View
Once you have logged sessions in the Log4.Desktop app, you can view them in the future via the Sessions Tab. A session can be selected by clicking Display Data like when connecting to a device. (Fig. 46)
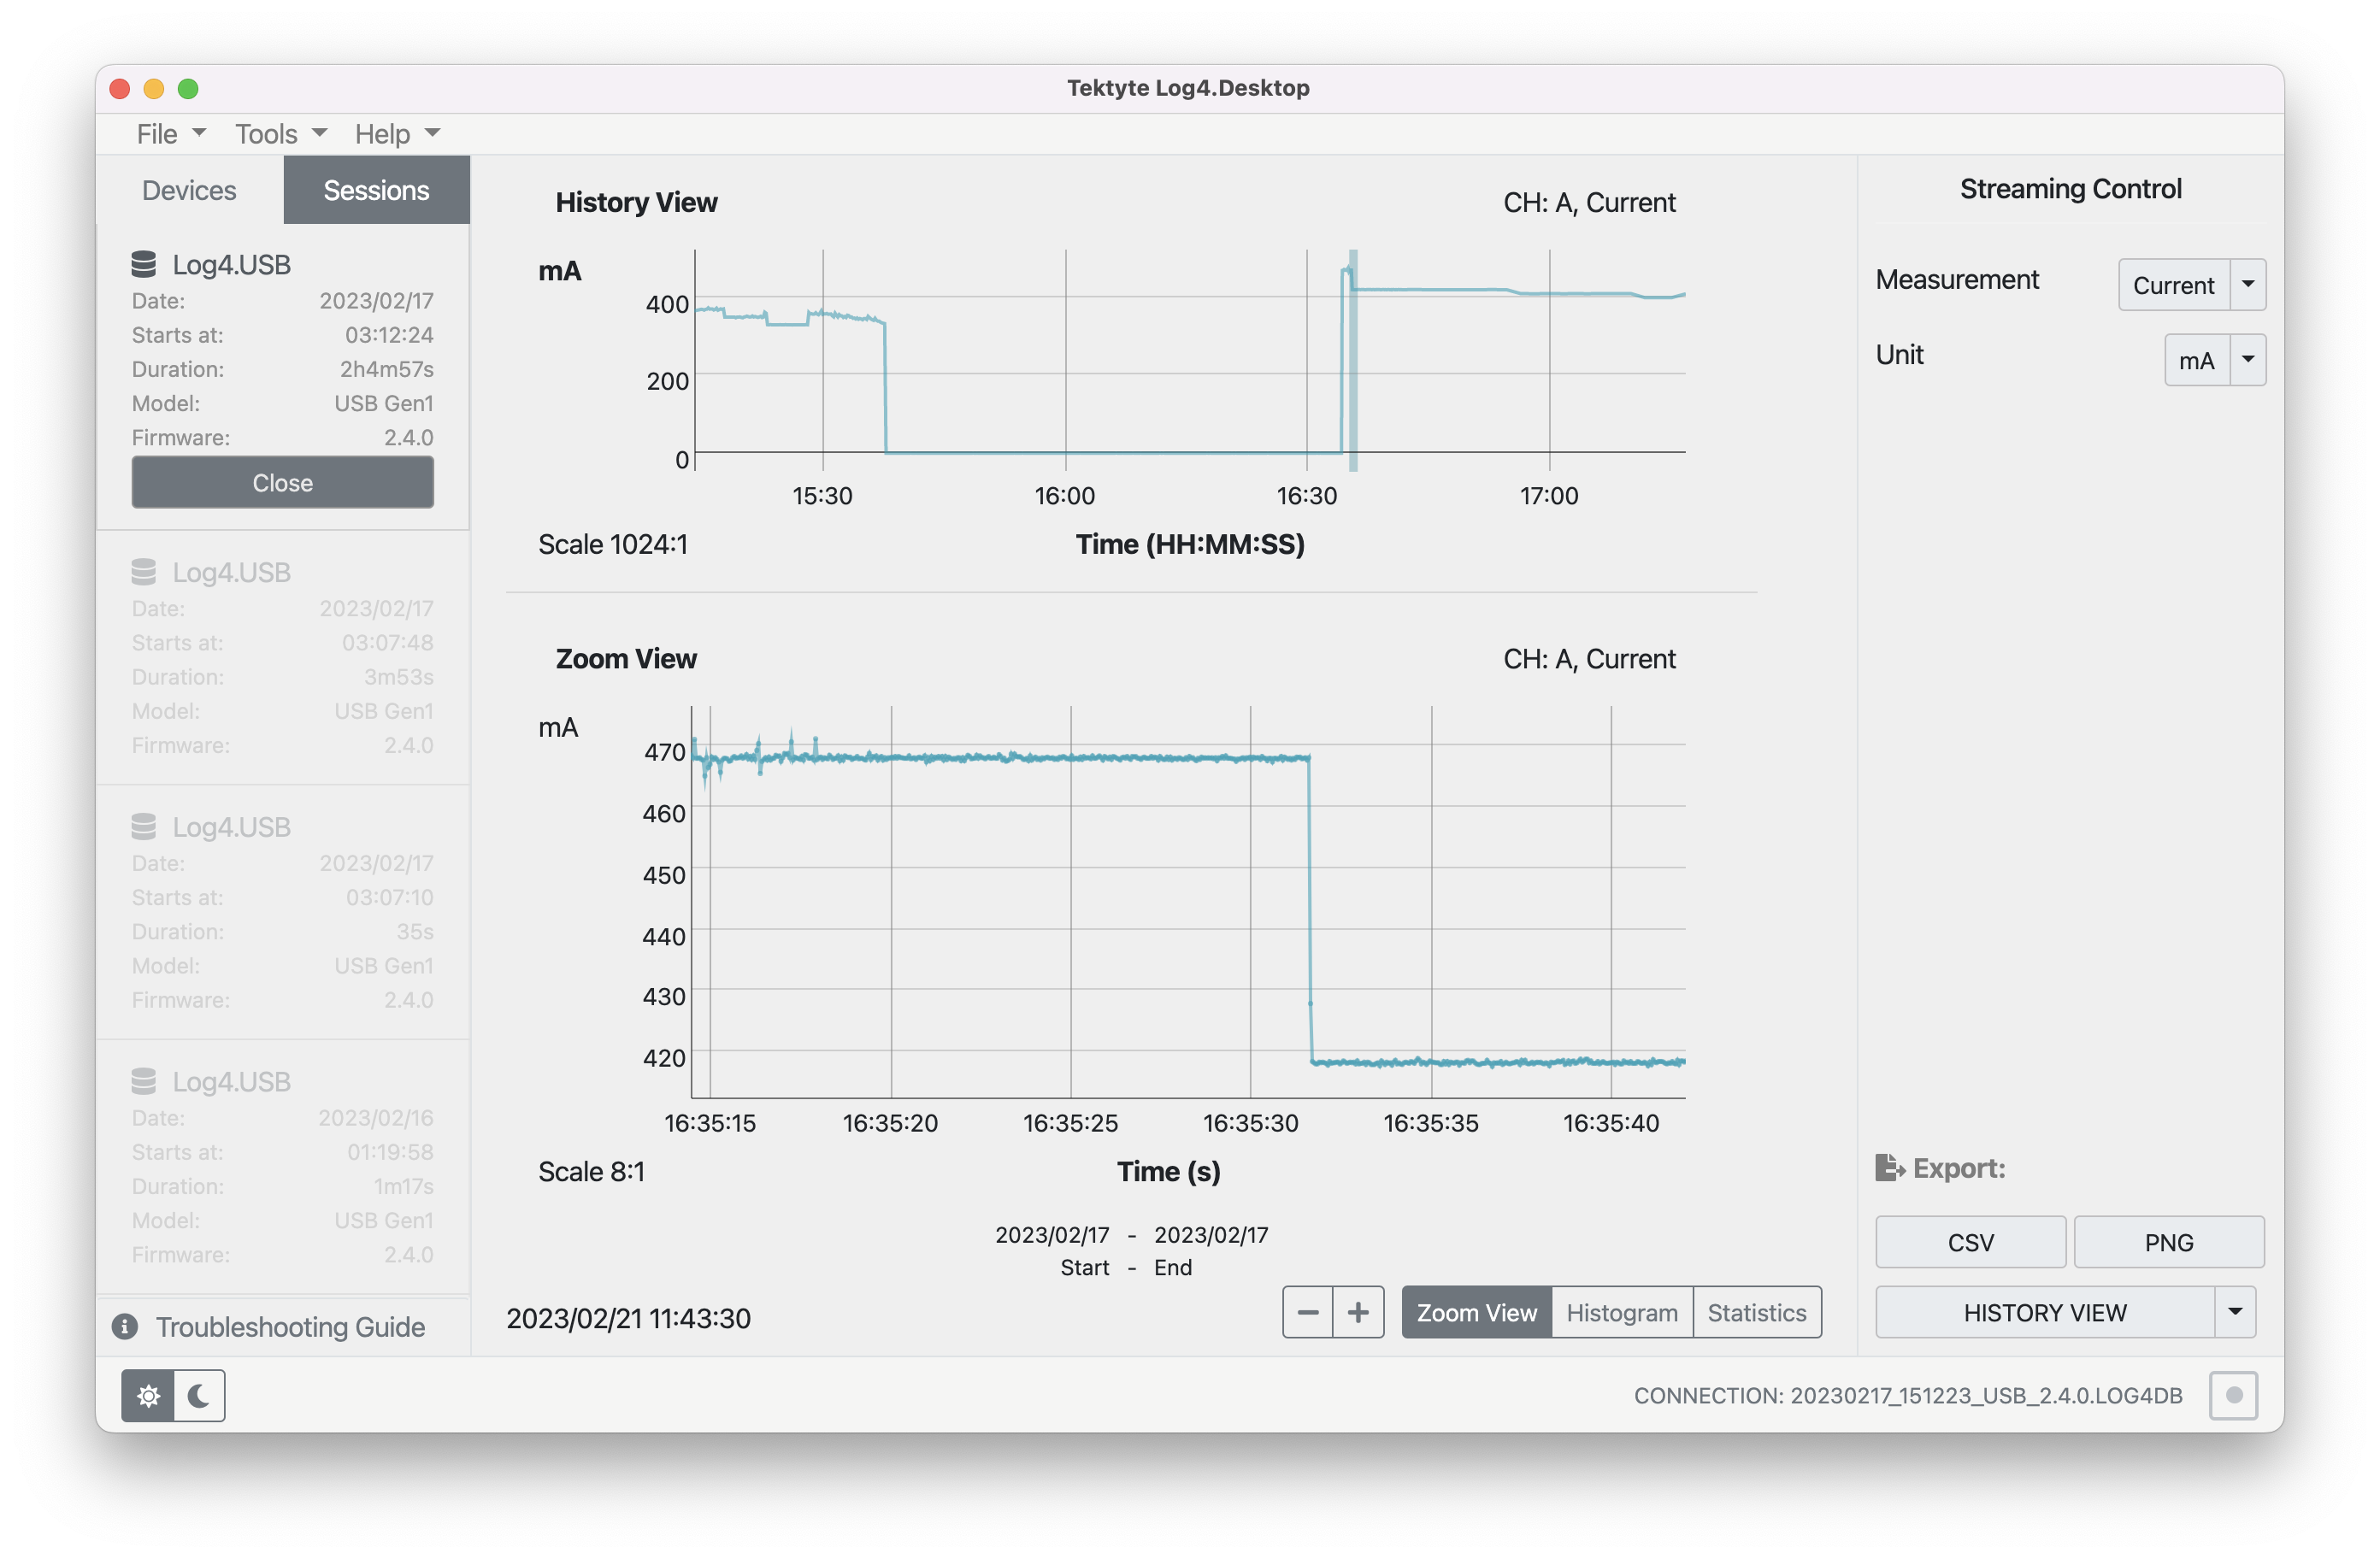
Fig. 46 Past session view
When viewing a session, the same controls are available as when viewing the data from a connected device, except for Sample Interval, Monitoring, and Reset controls.
Firmware Update
The Log4.Desktop app will prompt you to update a device if your firmware is out of date. If you choose not to update, you can update at a later time by disconnecting and reconnecting the device, or by selecting the Tools > Firmware Update menu:
Make sure the Log4 device is connected to the computer via micro USB cable.
Open Log4.Desktop Application.
Connect to the device.
Go to Tools > Firmware Update. The following popup will show.
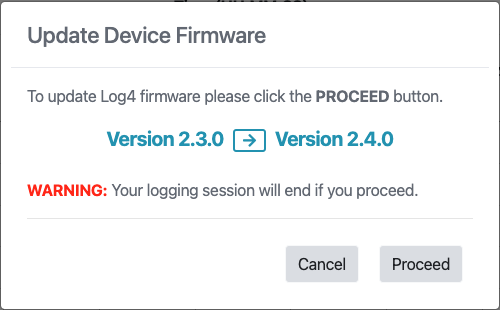
Fig. 47 Firmware update warning
Click on Update, the following screen will be displayed.
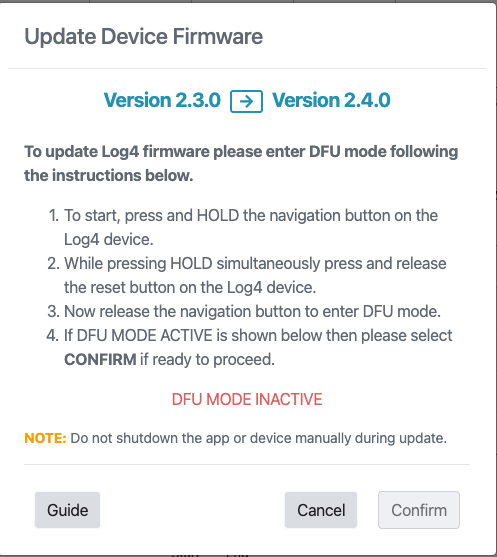
Fig. 48 Update disabled
Follow the on-screen instructions, then click ok. Once complete, screen will update as shown.
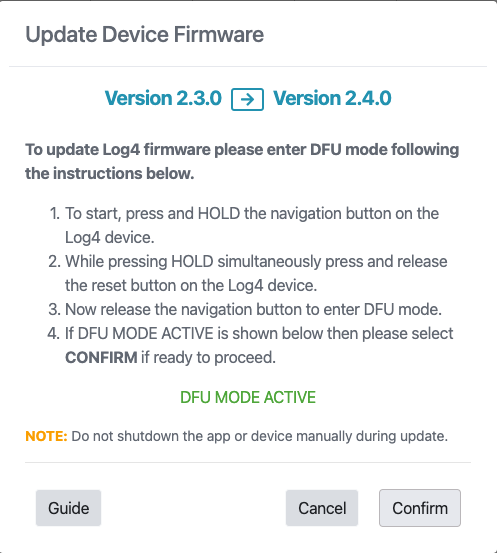
Fig. 49 Update ready
It should take around 2-3 minutes for the device to update firmware.
Once the update is complete, a pop up screen should come up. Press the reset button as instructed.

Fig. 50 Upload success message
Click on OK to complete update.
Binary Log Conversion
The Log4.Desktop software is also used to convert binary logs to CSV files. The tool is accessed via the Tools > Log Conversion menu. The length of the CSV files is given by the length chosen in Tools > App Settings > Max Rows in a CSV File.
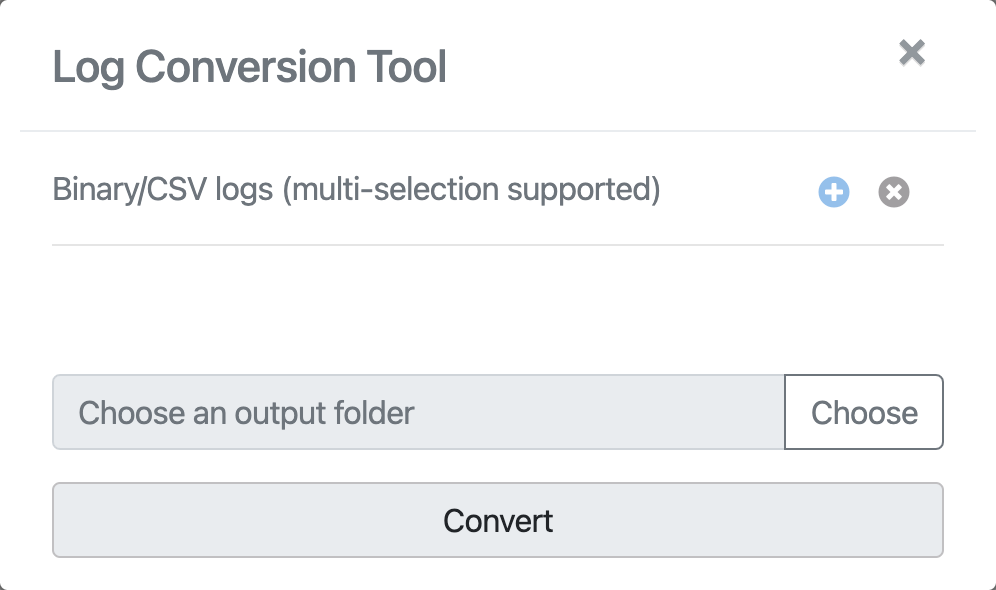
Fig. 51 Binary log conversion tool
Clicking the plus icon will open selection for
.log4binbinary files saved on the SD card or on your computer.
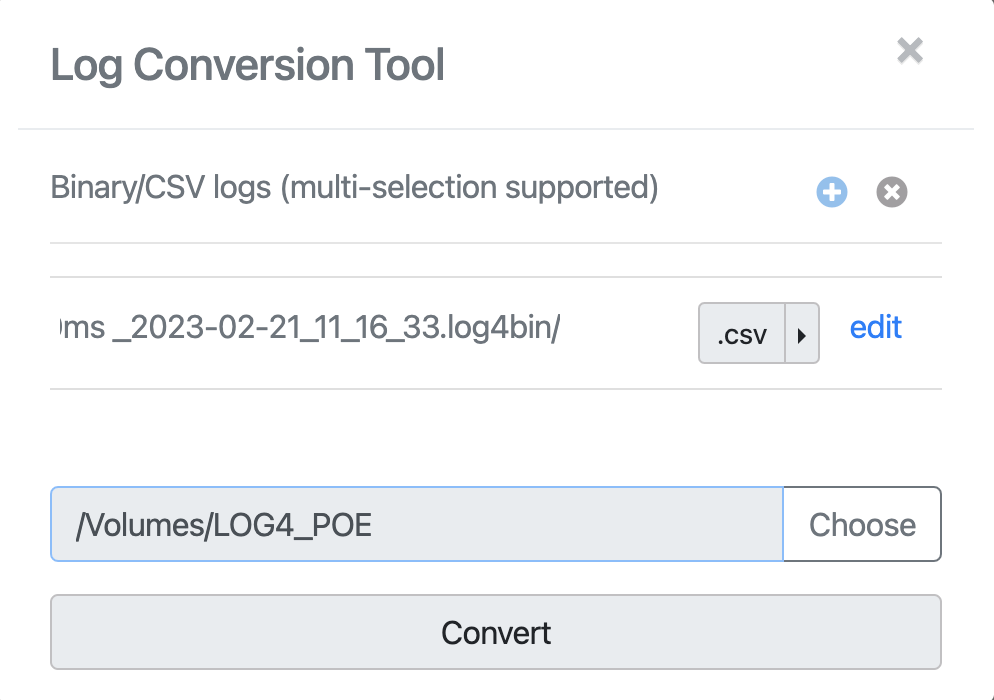
Fig. 52 Selection made in conversion tool
The edit menu allows for filename, firmware version, and device model to be selected. Once ‘save’ is clicked, the file will be renamed to reflect the parameters in the edit menu. Note: After renaming, the new filename may not update in the app. If this occurs, click the ‘X’ to remove the file from the list and then add it again by clicking on the plus icon.
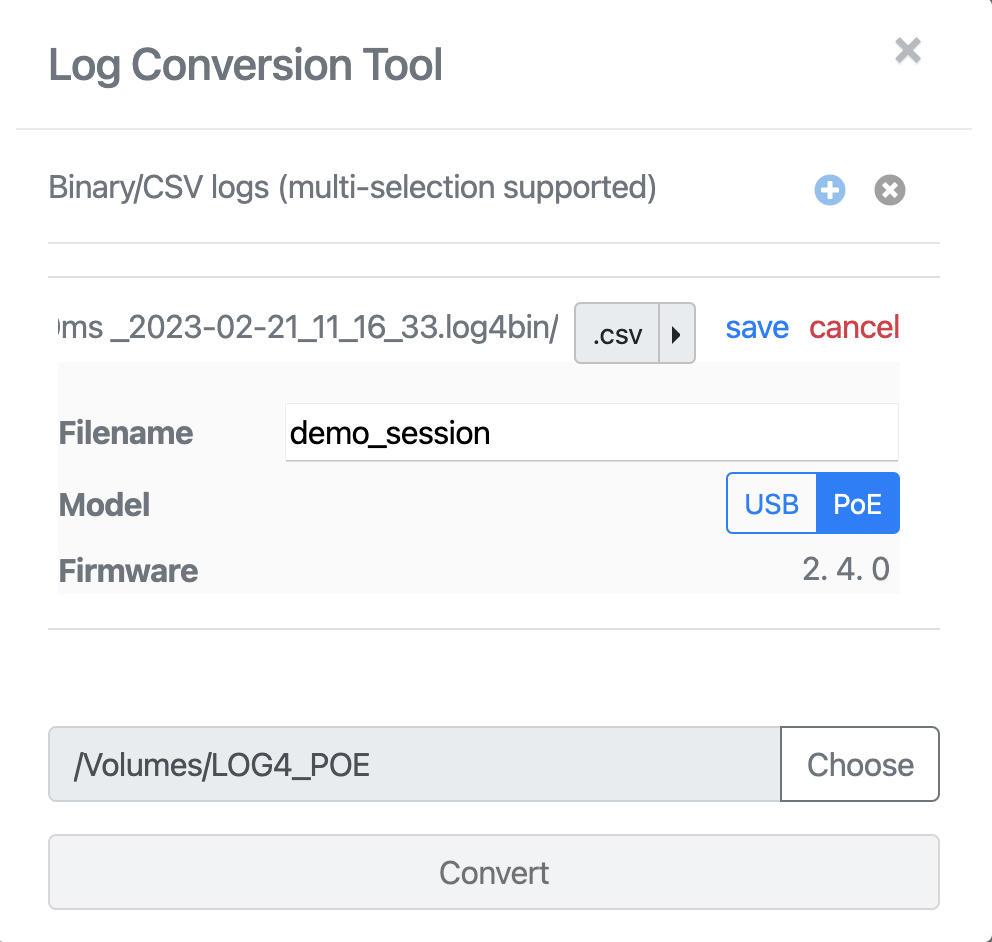
Fig. 53 Editing file details
Output folder is selected by the output folder selection menu.
By clicking Convert, logs will be converted and saved into the output folder. Depending on file sizes and the number of files, this may take some time.
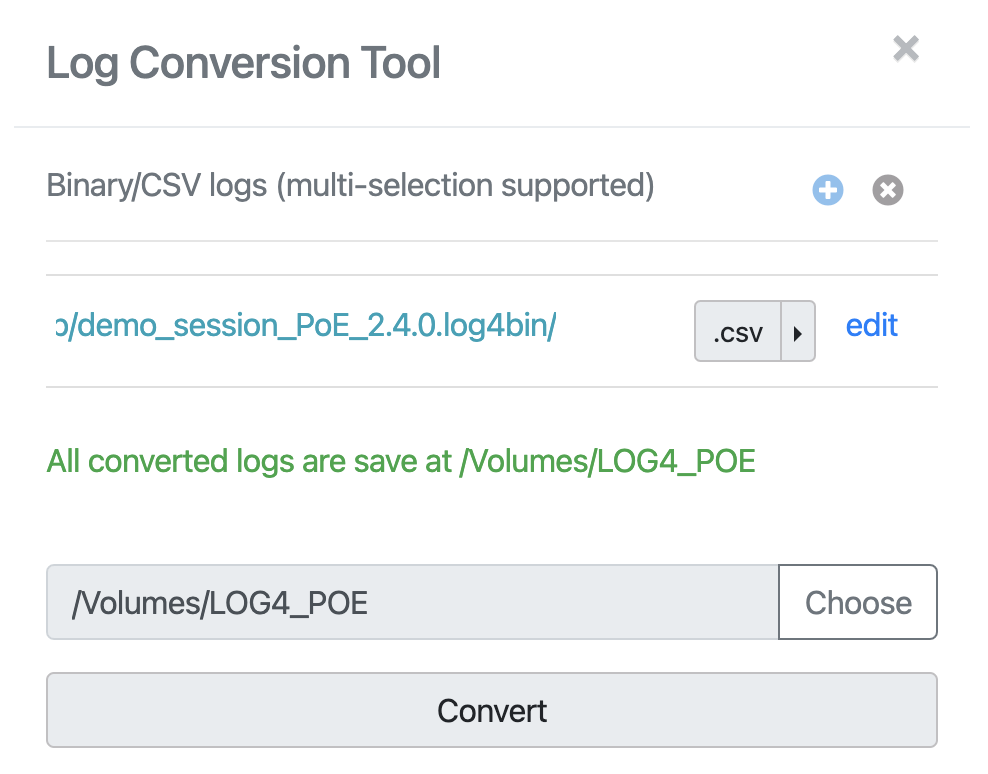
Fig. 54 Completed conversion