Quickstart
Package Contents
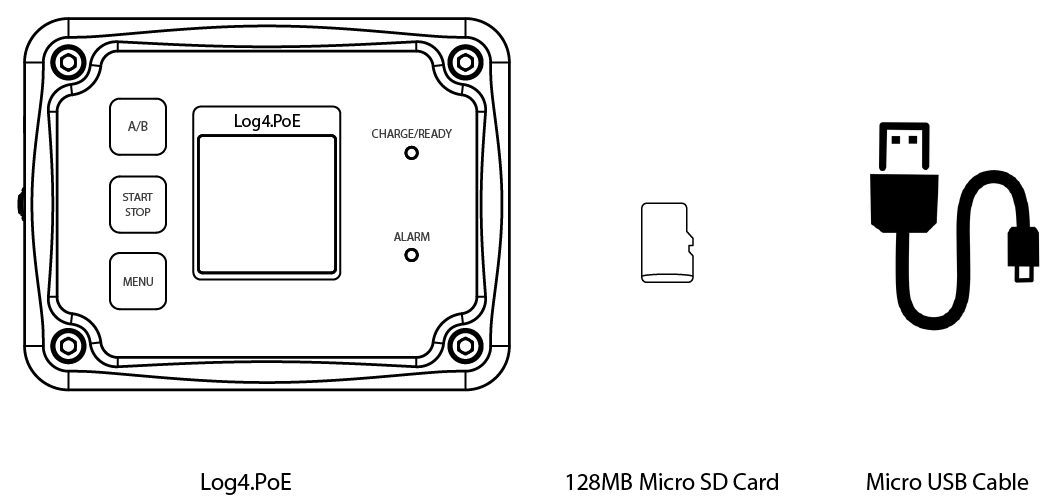
Fig. 59 What’s included in the box
There should be a USB cable, SD card and Log4.PoE device in the box. The Log4.PoE should be fully charged upon arrival.
Let the fun begin!
Turning device ON/OFF
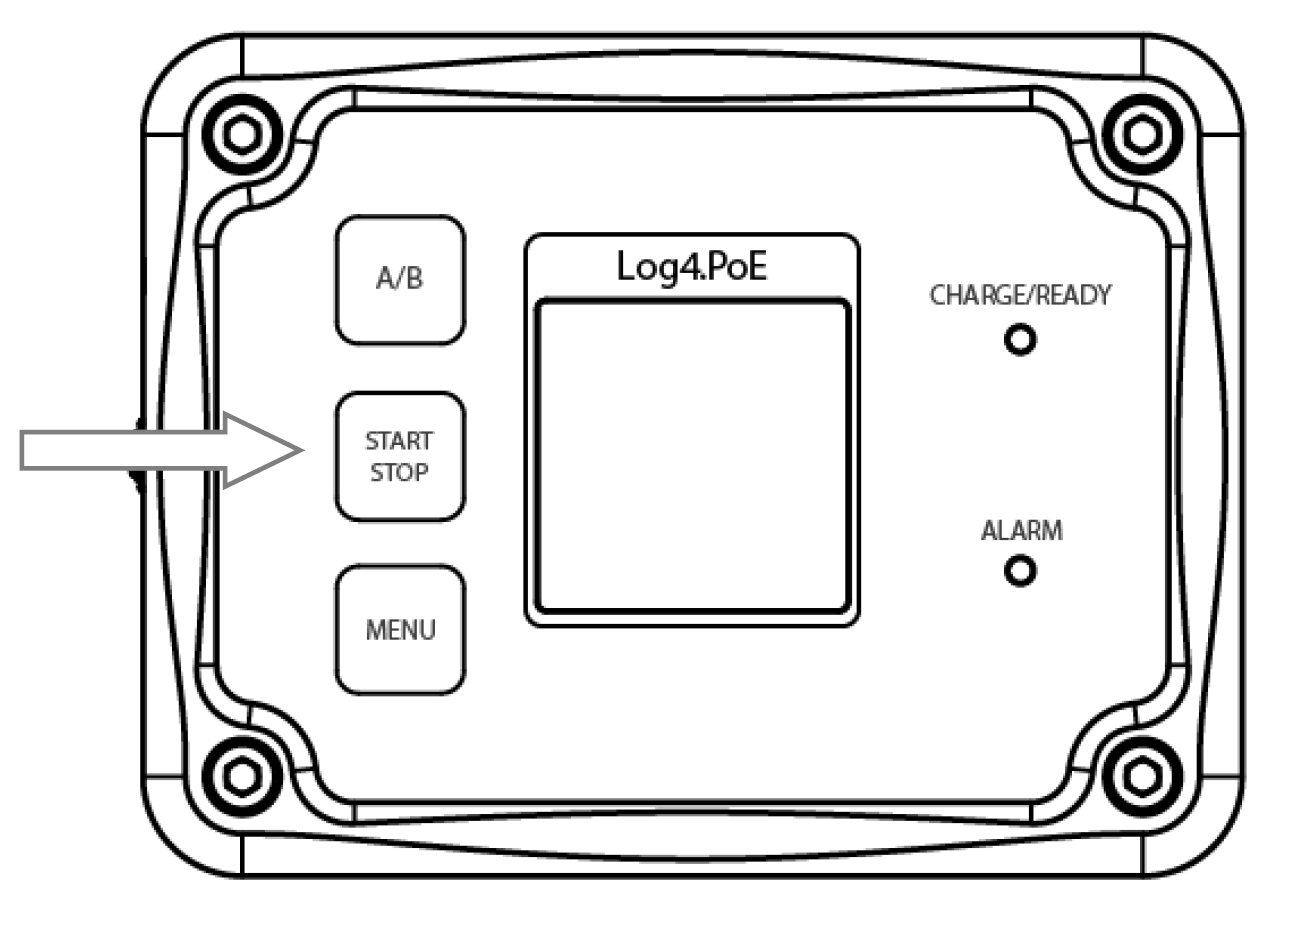
Fig. 60 Figure 6 Top Panel of Log4.PoE
Short press START/STOP key Fig. 5 to start the Log4.PoE Device. The display will turn ON almost immediately.
To turn off the device, press and hold the START/STOP key for around three seconds till the display turns blank.
Charging a battery
Plug micro-USB to Monitor USB port of the Log4 Device, if battery is not fully charged, the CHARGE/READY light will be red. If battery is fully charged, the CHARGE/READY light will be green.
Plug micro-USB to PC (or external power port)
It takes approximately 6 hours for the device to be fully charged.
Measuring Voltage, Current and power of an external device
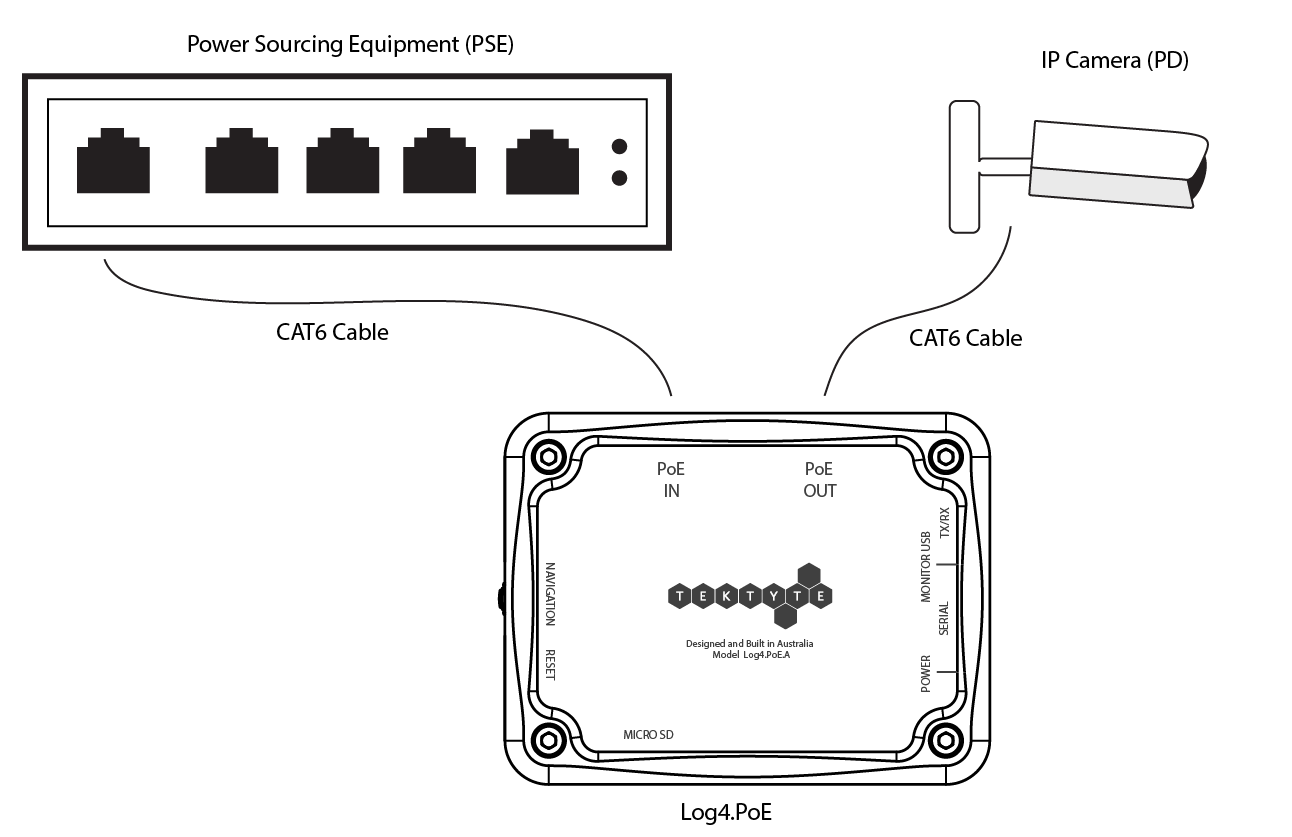
Fig. 61 General connection between PSE, Log4.PoE and a PD device
Connect PoE IN to a PoE enabled switch (PSE) Fig. 61.
Connect PoE OUT to the device that needs to be measure (for e.g. IP camera).
Press START/STOP key to wake the Log4 Device if it is not already ON.
Ta daaa! Current, voltage for each channel and power for channel A+B on the default screen (Fig. 62).
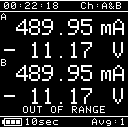
Fig. 62 Log4.PoE measurements screen
Connecting to Log4.Desktop Application
Live streaming of data can be achieved through the Log4.Desktop application.
Download the free Desktop application Log4.Desktop from Tektyte Website.
Unzip if required and install application.
Connect USB IN to a USB power supply.
Connect USB OUT to the device that needs to be measured.
Connect Monitor USB to computer.
Open up Log4.Desktop.
Ensure that the Log4.USB device is on (press START/STOP if not).
Select the device from the device pane on the left of the application, as seen in Fig. 63.
Live data will begin streaming to the application.
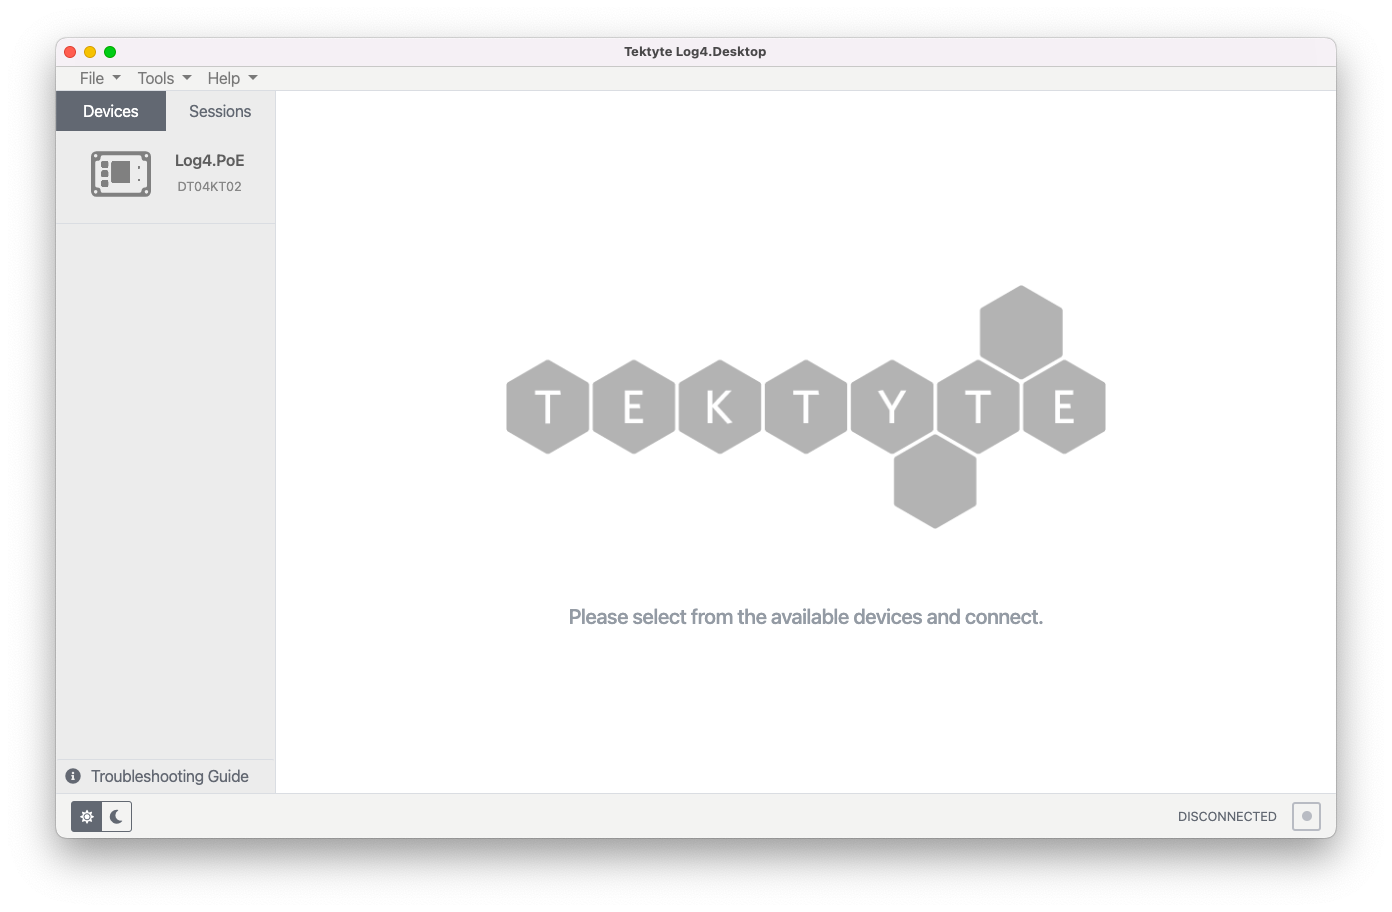
Fig. 63 Log4.Desktop app
The default sampling rate is set to be 10ms. If the Log4.Desktop is too slow or freezing, slow down the sampling rate on the device. See How to set Sample Period on LOG4.USB.
If the data does not stream, USB cable may be faulty. Try with different USB cable.
If the data still does not stream, see Troubleshooting Guide.
Accessing the menu system
Short press the Menu key for a list of settings.
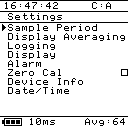
Fig. 64 Log4.PoE menu screen
Use the Navigation Scroll Wheel on the left-hand side of the device to slide up and down the settings list, press inwards to select the desired option.
Inserting a micro SD card
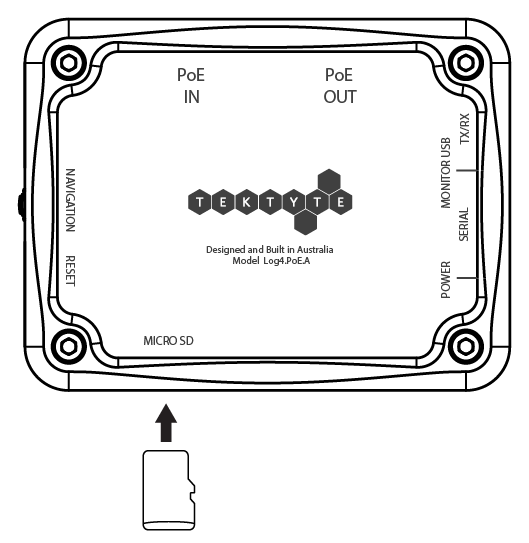
Fig. 65 Inserting Micro SD Card (Bottom view of Log4.USB)
Ensure the SD card is facing label side down and insert it into the SD card slot until it clicks into place as shown in Fig. 65.
Make sure the SD card is in FAT 32 format.
Short press START/STOP key to log data onto SD card.